
Combinatorial Game Theory, as you might expect, concerns itself with the studies of games. In particular, it focuses on a class of games known as combinatorial games. A game is a combinatorial game if it satisfies all of the following properties:
- The game has exactly two players.
- The game has some number of positions, which can be moved from by a player to other positions.
- The two players move in sequence.
- The game has no randomness.
- Both players have complete information about the game state.
- A player loses if they are unable to move (this is called the normal play condition)
- The game must end. At some point, a player will be left unable to move.
Later, that last rule will be lifted, but for now we’ll only focus on finite games. Some examples of games which are not combinatorial games are:
- Monopoly, due to the rolling of dice introducing randomness.
- Poker, due to the incomplete information of the hidden deck and other player’s hands.
- Tic-Tac-Toe, due to the existence of draws (whoever is left unable to move may not necessarily lose, they may tie instead).
As for examples of combinatorial games, we will see a handful throughout this series, and you will see even more if you dive into Winning Ways, but our game of choice for a large portion of this series will be Hackenbush. It’s a simple game, extremely useful for learning general analysis.
Our Players
Before we get into the rules of Hackenbush, we need to introduce our players. Since several games will be covered and it will help to have consistent names across all games, allow me to introduce you to Lazuli and Ruby:
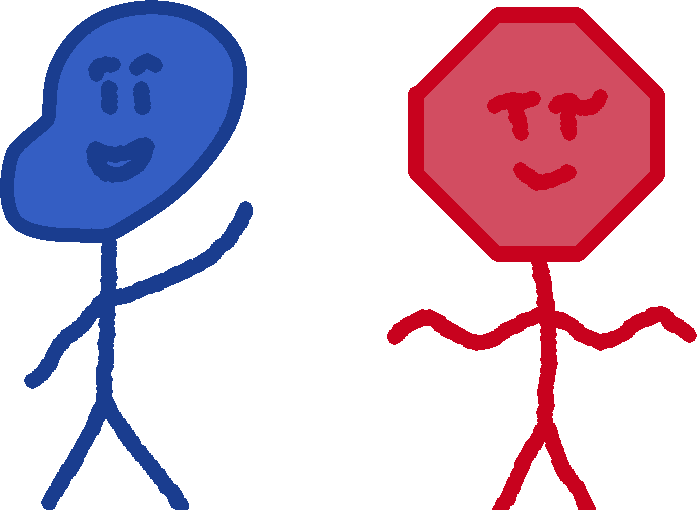
Whenever I show some diagram of a position in a game, if possible, the various parts of the game will be color-coded to show whether they’re “associated” with Lazuli or with Ruby. Sometimes the actual game as described in Winning Ways or elsewhere won’t have this direct association to the players, instead some more arbitrary one, but in this series things will be as color-coded as possible.
On top of that, in the future when we get rigorous, you’ll find that the L and R I’ve ever so conveniently placed at the start of their names will also help keep things straight. But we’re getting ahead of ourselves.
The Rules of Hackenbush

Hackenbush is a game of branches. A position in Hackenbush is composed of a collection of branches which are either connected to some other branch or to the ground. On each player’s turn, they must remove one branch of their color (that is, Lazuli removes their blue branches and Ruby removes their red branches). If, after this cut, a branch is left unconnected to the ground, it too is removed. For example, in Figure 1.2, if it was Ruby’s turn and they elected to cut the rightmost red branch, that blue branch on the far right would also be removed. As this is a combinatorial game, whoever finds themself unable to move loses.
Analyzing Hackenbush
What we would like to do throughout this series is look at a position and determine whether Lazuli or Ruby has a winning strategy from that position. First, we will look at some very simple positions:
In this position, there is nothing. Lazuli has no moves, and Ruby is also without any moves. So, whoever has the misfortune of holding the current turn will immediately lose. Or, in other words, the winner in this position is whoever moves second. This will be important later. Now, for the second simplest Hackenbush position:

In this position, Lazuli has a single blue branch. If Ruby starts here, they will immediately lose. However, if Lazuli starts, they can cut their single branch and force Ruby into the empty position, whereupon Ruby loses. Lazuli wins no matter who goes first.
A helpful way to think about this is that the branch gave Lazuli a spare move. If Lazuli has to move, they can simply cut their free branch and then force Ruby to make a move in turn. However, this branch won’t help Lazuli any more than once, since after it is gone Lazuli is left to find a move elsewhere. Because of this, we will say that this position has a value of \(+1\).
If we were to replace that blue branch with a red one, the same logic would hold in the other direction and we would say that Ruby has one spare move which allows them to win no matter who goes first, and that the value of the position would be \(-1\).
Furthermore, if we wanted to, we could continue to stack branches of the same color on top of each other to grant Lazuli or Ruby even more spare moves. Let’s say we built some structure out of five blue branches. They could be a chain of branches one on top of the other, or they could all connect to the ground individually, or they could be in some weirder shape. In all of these cases, Lazuli will be able to find some order to cut the branches so that they are all of use. Ruby can’t interfere by breaking the structure’s connection to the ground, because it’s entirely blue. Thus, it gives Lazuli \(5\) spare moves of advantage. Similarly, a structure of five red branches connected to the ground confers Ruby five spare moves, so it will have a value of \(-5\). There’s nothing special about five here, of course, if we have \(x\) branches all of one color with no branches of the other color in the structure, it confers a value of \(x\) if the branches are blue, and \(-x\) if the branches are red.
So, what would happen if we do this?

If we play this out, we find that whoever moves first must cut their branch, after which the second player will cut theirs, leaving the first player without any moves. Whoever moves first loses, just like in the empty position. What is the value of this position?
Finding this out reveals a fundamental aspect of Combinatorial Game Theory: the ability to combine positions. In Hackenbush, combining two positions is simply putting them next to each other, but later we’ll find out the general way to combine two positions in any game.
In this case, our position is made up of two simpler ones, one with a spare move for Lazuli (value \(1\)) and one with a spare move for Ruby (value \(-1\)), and it looks like the spare moves cancel each other out, so we will say that the value of this position is \(1 + (-1) = 0\).
This works in general, too. If you had a position with three blue branches (value \(3\)) and a position with seven red branches (value \(-7\)), their combination would have a value of \(3 - 7 = -4\). You can verify this by playing the game out and seeing that Ruby wins going first or second, and they have at least four moves to spare when doing so.
(You may be asking yourself at this point whether or not adding these spare move values to get the value of a combined position actually works, and for now I unfortunately say that you’ll have to trust me that this works. You’ll see a rigorous explanation of this addition later.)
The fact that this value came out to zero when the branches are equal on both sides is very important. Zero is special. It is the value of any position where the second player can always force a win, no matter who starts. The empty position also has a value of zero for this same reason. This allows us to look at the value of a position and determine who can force victory:
Let the value of some position be \(x\). Then,
- If \(x > 0\), then Lazuli will be able to win no matter who goes first.
- If \(x < 0\), then Ruby will be able to win no matter who goes first.
- If \(x = 0\), then whoever moves second will always be able to win.
These useful properties of addition and comparison with zero will help show a simple, useful, and humorously named method of analyzing some seemingly complicated positions.
The Tweedledee and Tweedledum Argument
The Tweedledee and Tweedledum Argument is, in essence, a way to show that \[ x + -x = 0 \] using the fact that zero positions are a win for the second player.
But first, what does \(-x\) look like in general? Suppose we had some position that had a value of \(x\). Now suppose we generated a new position that took the old, and swapped all the red and blue branches. In this new position, Lazuli’s options are the same as Ruby’s in the previous position, and vice versa. We have swapped the roles of the two players. If Lazuli had some number of spare moves in the old position, they are now Ruby’s, and vice versa. Given how we defined spare moves for the two players giving values of opposite signs, what this does to the value \(x\) is change its sign to \(-x\).
Now for the Argument. To show this, we’ll take our sample position from Figure 1.2 and combine it with its negative:

Suppose it’s Lazuli’s turn. They decide to cut one of the blue branches in the left half. If the Tweedledee and Tweedledum Argument is true, this entire position should have a value of \(0\). How should Ruby respond, then, to ensure victory? Since the right half of the position is the negative of the left, whatever move Lazuli made in the left half has a corresponding move avaliable to Ruby in the right half. Ruby can then make this move. If Ruby simply continues this process, always “copying” whatever move Lazuli does, they will never be left moveless. This means that they cannot lose, and since the game must end, Lazuli will eventually run out of moves. This hands the victory to Ruby, the second player. By exactly the same logic, Lazuli wins when Ruby goes first. This means that the second player always wins, forcing the value of the position to \(0\).
Summary of Part 1
- A game is a combinatorial game if it has two players, if has no randomness or hidden information, if a player loses when unable to move, if the two players move sequentially from one position to another, and (for now) if the game will eventually end.
- Positions in combinatorial games can be given values which tell us who will win that position, and by how much.
- If a position has a positive value, Lazuli always wins it. If it has a negative value, Ruby always wins it. If it has a value of zero, whoever goes second will win.
- One way of finding the value a Hackenbush position is splitting it up into individual components and adding up their values.
- The Tweedledee and Tweedledum Argument shows that combining a position with its negative will produce a zero position.
In Part 2, we will
- Invent fractions (though only some of them).
- Encounter our first bit of weirdness.